Closing the Books in Business Central
This list guides you through akoyaGO Closing Accounting Periods and Closing Income Statement Accounts.
Things to Know:
- In Business Central you are not required to close accounting periods (generally a year) but doing this will make some other filtering options available to you in reporting.
- You can post back to closed accounting periods. If you do, you’ll want to re-run the closing of the income statements again.
- Closing the Income Statement accounts (revenues and expenses) to Net Assets will NOT delete any detailed data you have in the General Ledger.
Overview
The annual closing process can be broken out into three main steps:
- Close the Accounting Period – this must be done before you will be able to close the Income Statement accounts
- Make Adjusting Entries – usually corrections or auditor adjustments
- Close the Income statement accounts to Net Assets
Below, we will break down each step.
Step One: Closing the Accounting Period
1. From Business Central's home screen select Setup>General Ledger Setup
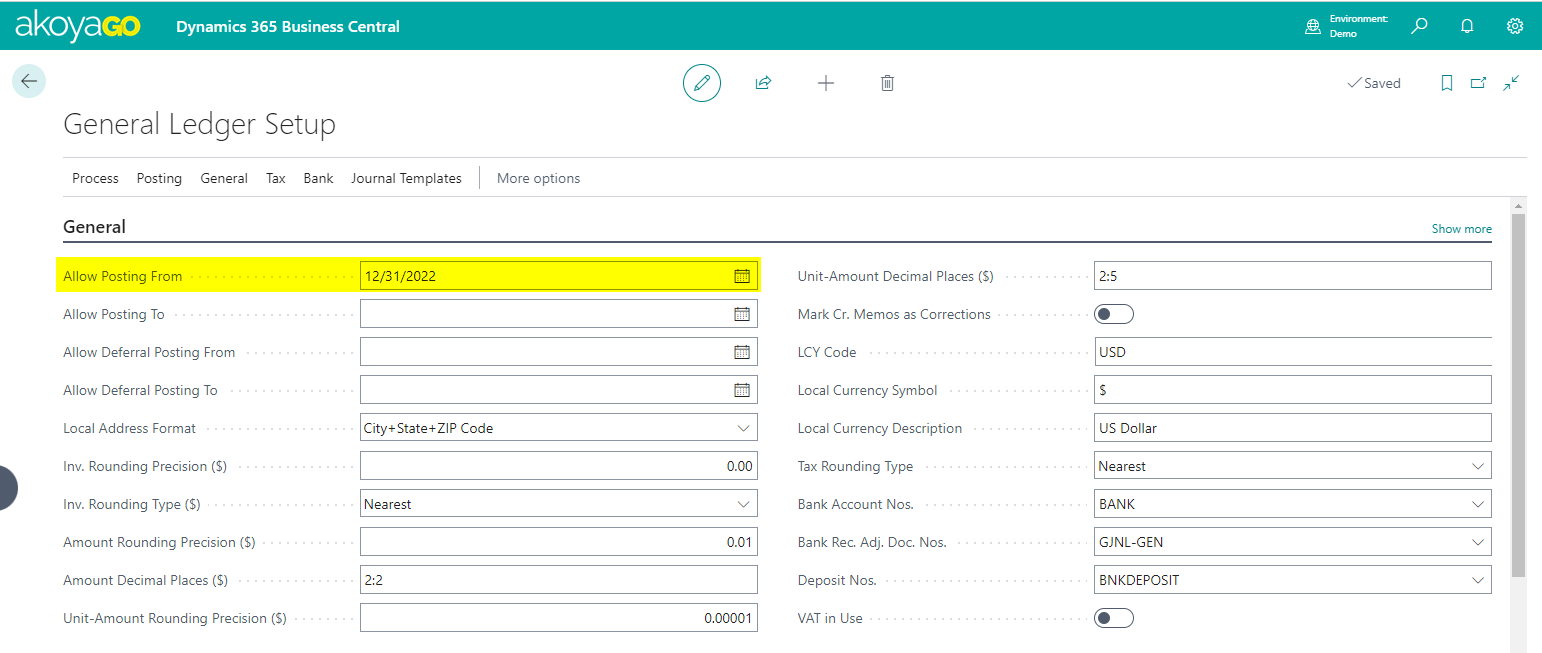
2. Make sure in the General section that the Allow Posting From date is set to the last day of the financial period you are closing (for example 12/31/2022). Close General Ledger Setup when complete.
3. From Business Central's home screen select Setup>Accounting Periods
4. Select the last month in the period you want to close. Then, in the toolbar, select Home, then click Close Year.
- Most akoyaGO clients do this annually. Once a fiscal period is closed you will not be able to re-open it, but you can still post entries to it. These entries will be marked as prior year entries.
Note: you will not be able to close a year before you open the new year.
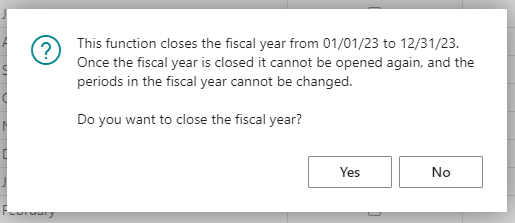
5. A warning message will pop up. Click Yes if you want to move forward and close the period you selected.
Note: Notice that now the Closed check box and Date Locked checkboxes are checked in the Accounting Period. You cannot uncheck these fields.
Step Two: Making Adjusting Entries
1. Make adjusting entries – usually provided by your auditor. You can post to a closed accounting period. The entries will have the Prior Year Entry check box marked.
Step Three: Closing the Income Statement Accounts to Net Assets
Note: The accounting period must be closed prior to running this step.
1. From Business Central's home screen select Setup>Accounting Periods
2. From the Accounting Periods window choose Close Net Assets
3. The akoyaGO Close Net Assets window will appear. Complete the fields as shown in the screenshot below, the Fiscal Year Ending Date will default to the accounting period ending date you just processed. The Posting Description text will appear on each entry line in the ledger after it’s posted. It will auto-populate, but you can customize it if you want. Click OK.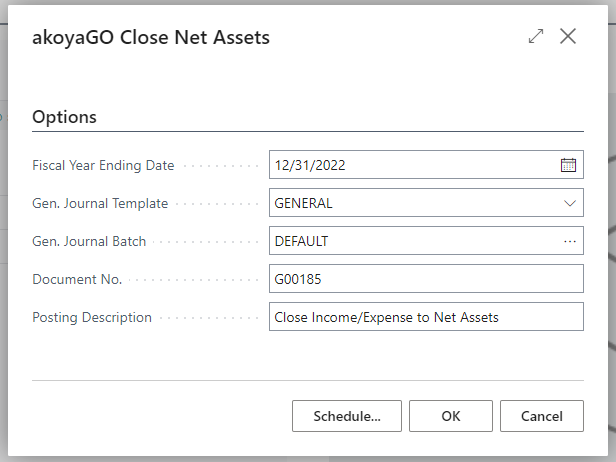
4. A pop-up box saying “Working on it…” will display while the process is being completed. You might get an additional popup that certain Dimension Value Codes cannot be found. When the process is complete you will be at the main Business Central screen.
Confirm General Ledger Entries and Post
1. Click on the Finance menu and select General Journals.

2. Open the Default General Journal.
- Here are the closing entries. Before posting, review the entries to be sure ONLY closing entries are in the journal.
Tip: Sort by the Posting Date column – first A-Z and then Z-A only entries that begin with a C followed by the closing date (example C12/31/2021) should show.
3. Once the entries have been confirmed, click on the Post/Print menu, and select Post (or Post and Print if you want a printed report).

Update the General Ledger Setup
At this point, you should re-set the Allow Posting From date value.
1. Using the magnifying glass (Search tool), search for General Ledger Setup.
2. Allow Posting From date.
- Make sure in the General section that the Allow Posting From is set to the first day of the new financial period you are closing (for example 1/1/2023).
3. Close the form.
Re-Close (Block) Departments - If Necessary
This step is only necessary if you got a notification in step three saying you had certain Dimension Value Codes that could not be found.
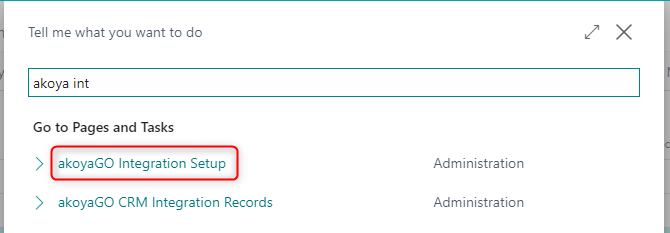
1. Using the magnifying glass (Search tool), search for akoyaGO Integration Setup.
2. Select the Department row.
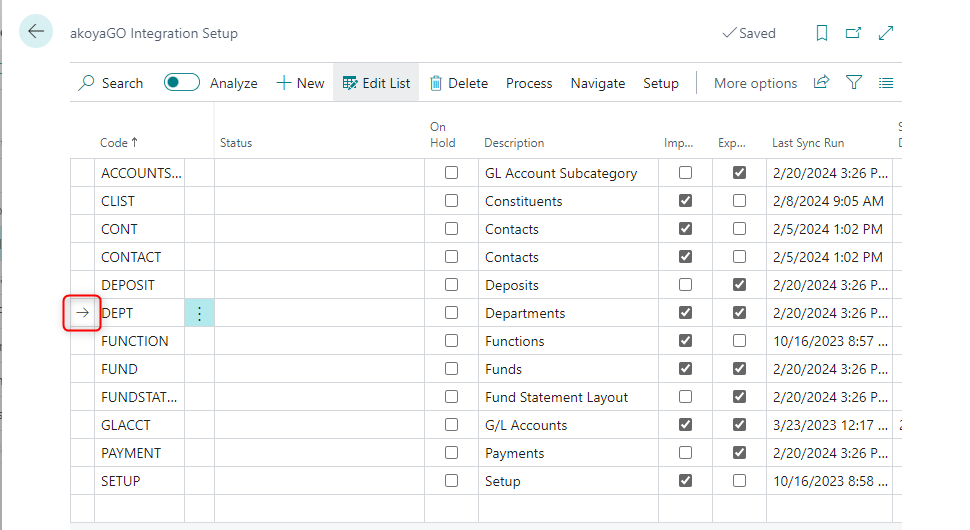
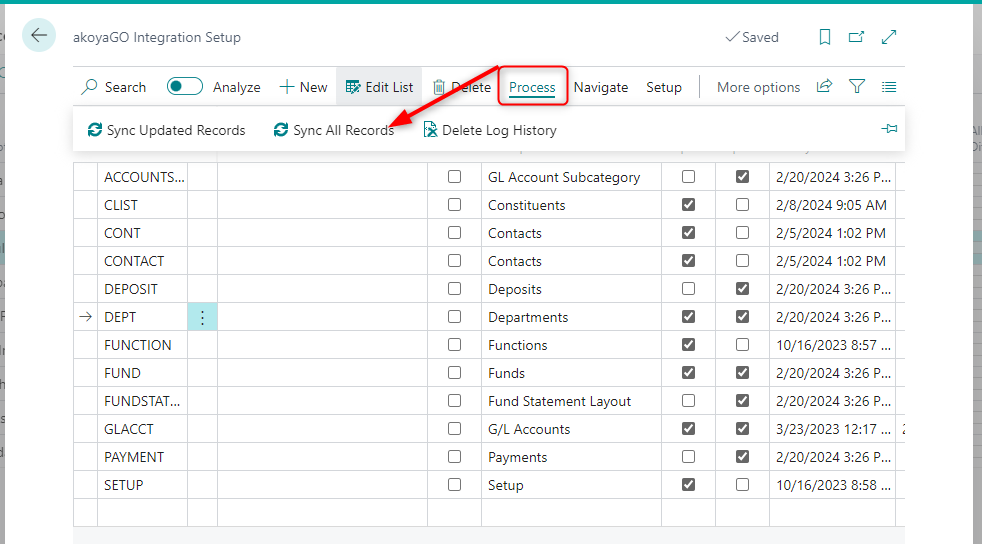
3. Click on Process and select Sync All Records.
Appendix A
If you saw a message box at the time of posting the closing entries that indicated there was a Dimension Value Code issue, you’ll need to find the dimension indicated in the message and ‘unblock’ it.
1. Click on the Finance menu and select Dimensions.

2. Highlight the dimension that the popup indicated.

3. Click on Dimension and then Dimension Values

4. Find the department that was mentioned in the message and uncheck the Blocked check box.


