

Updated 07/10/2026
GOfund is akoyaGO’s donor portal. When invited, fundholders and donors can use GOfund to view fund statements, see grant and gift history, or make grant recommendations. GOfund has functionality in akoyaGO CRM and as an external user interface (UI). Managing your GOfund settings and processing grant recommendations takes place in akoyaGO CRM. Fundholders and donors will interact with the User Interface (also known as the GOfund UI.)
- Fund Connections
- GOfund Email Invite
- Impersonate a Donor
- GOfund Logs
- GOfund Settings
- Departments
- Funds
- GOfund UI
- Suggested Routine Maintenance
Fund Connections
For a donor/fundholder to access the GOfund account, they need at least one active Fund Connection with the Donor Portal Access (GOfund) Role. Within this Connection, permissions will also be set for this individual (Contact) and this Fund.
To set up a Fund Connection for an external user, access the Funds table from the Fund Management area. Select a fund. From the Fund record, click Fund Connections. Then click +New Connection.
A New Connection form will open. Because you are setting up this Connection from the Fund record, note that the Fund is set as the Connected From.
Search for a Contact record to fill in the Name field. GOfund connections must be between a Fund and Contact record.
When searching for a record to connect, results can be mixed across tables. To ensure you are pulling in the correct Contact (not a User or Donor), you can filter the record type to Contact. Click the magnifying glass in the Name field, then select “All Records.” Click on the “Results from ## Record types,” then select Contact. If you select anything other than a Contact record, the system will prevent you from saving a Donor Portal Access (GOfund) Connection.
Next, click into the As this role field and select Donor Portal Access (GOfund). Note: the Contact must have a valid email address to create this type of Connection!
Upon selecting the Donor Portal Access (GOfund) role, a Donor Portal Access subgrid will appear with the role’s permission sets. Here you can choose the access level for an individual GOfund user.
You will be required to enter a Start Date; it may be in the future.
GOfund invitation emails are sent based on the Start Date and the GOfund Email Sent field. If the GOfund Email Sent field is blank and the Start Date is today or in the past, the email is sent when the connection is created. If the Start Date is in the future, the email will be sent overnight on the Start Date. If the Start Date is updated after the connection is created, the email will be sent overnight based on the revised Start Date.
When the GOfund invite is sent, the GOfund Email Sent field will populate with the date. More information on this email can be found in the following section of this Knowledge Article, GOfund Email Invite.
End Date and Description are not required.
When you are satisfied with your Fund Connection, click Save or Save and close.
Please note: it may take up to 20 minutes for this user's fund(s) to appear in GOfund.
Resend Invite
If the user did not receive their invitation email or it needs to be resent for any reason, use the Resend Invitation button from the Connection record. When clicked, the system checks whether the Contact can receive email. If they have a valid email address in the Email Address 1 field, their Contact Preferences do not indicate Do Not Allow Email, and the Connection is active, the email will be resent. A note is recorded on the Contact's timeline documenting the resend.
Deactivate a fund connection to remove the fund from the user’s available funds in GOfund.
GOfund Email Invite
Once the Fund Connection is established, the user will receive one of three emails based on the Connection's Start Date. The sender of this email will be the Foundation Staff Contact listed on the Fund record; if no Foundation Staff Contact is listed, the sender will be the Foundation User listed in the GOfund Settings.
All three emails below are driven by Email Templates. For more information on accessing and editing Email Templates, please see the Knowledge Article How to Edit an Email Template in akoyaGO.
A first-time GOfund user will receive an email inviting them to create their GOfund account. This email includes a link to create the user's password. This link is valid for 90 days; however, we do not recommend including it in the email to the fundholder.
This email is driven by the GOfund - Invite New User Email Template.
A first-time GOfund user who has previously registered with another GOportal (GOapply or GOdonate) will receive an email alerting them that they have access to the donor portal and can log in with their existing credentials. This user can log in to GOfund with the same credentials used for GOapply or GOdonate. This email is driven by the GOfund first-time login Email Template. An established GOfund user who has been connected to a new fund will receive an email alerting them to the new fund being added to their account. This email is driven by the GOfund - Access to a New Fund Email Template.
If a donor tries to click the invitation link after already registering their account, they will be prompted to log in. They should click the Login link.
If a donor's invitation link has expired, they will be directed to a page with a button to resend the invitation email. They should click the Resend Invite button and use the link in the new email to register their account.
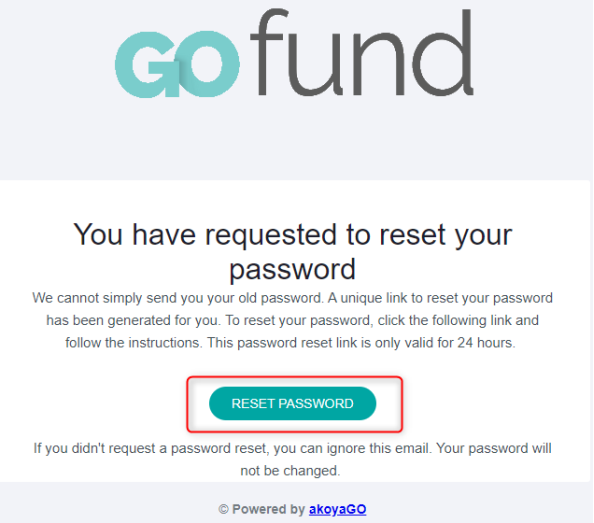
If a user has forgotten their password, they can click the Forgot password link on the sign-in page and enter the email address used to log in to GOfund. They will receive an email with a link to reset their password and should click the link/follow the prompts. Please note the link is only active for 24 hours. This email is driven by the GOfund - Reset Password Email Template. For more information on accessing and editing Email Templates, please see the Knowledge Article How to Edit an Email Template in akoyaGO.
If a GOfund user needs to change the email address they use to log in to GOfund, update the contact's Email Address on their Contact Record in akoyaGO. Click Save.
You will see this message before the new email address is saved:
Choose OK to save your changes.
Once the email address on the Contact record is saved, the user can log in immediately with the updated email address.
Impersonate a Donor
akoyaGO Users with proper permissions can impersonate a GOfund User. This can be useful for donors who wish to bypass the donor portal.
Impersonation is available only to foundation staff who are members of the GOmanager Users Security Group. For more information, please see the GOmanager Security Group.
To impersonate a GOfund user, navigate to the Fund Connection. You can do this from the Fund record > Connections tab, or directly from the Connections table. If you are accessing directly from the Connections table/view, double-click on a blank space of the record, not the link text. Clicking on a name or fund number will take you to the corresponding records.
From within the Connection record, drop down GOfund from the top toolbar and select Impersonate.
A new window will open where you can sign in as the user. Click Sign In.
Next, you’ll be logged in to GOfund as that user and will be able to access everything the user can. If recommending a grant as this user, please note that a Request or Interfund will be created. Use with caution**
WARNING: DO NOT IMPERSONATE MORE THAN ONE USER AT A TIME.
GOfund Logs
Each GOfund user’s activity will be recorded and stored in akoyaGO CRM.
In the Activities table, filter on Activity Type for GOfund Logs to see all GOfund activity. If you are looking for information about a specific user, their GOfund activity will also appear in the timeline of their Contact record.

GOfund usage metrics can also be found in a Dashboard called GOfund Usage Metrics.
GOfund Invites utilizes the statuses of Created, Sent, In Progress, and Completed.
Created - Invite is created
Sent - Invite email has been sent
In Progress - Invite link has been clicked, but the user did not complete onboarding
Completed - User has completed onboarding (submitted a password)
Last GOfund Sign In: On Contact records, there is a field that records their most recent GOfund session. This field records the date and time of their last login to GOfund. The best use of this field is to build a view that shows how often fundholders log in, so foundation staff can keep track and let that inform the communications strategy. This data point can also be found in the system view Donor Portal Connections.
GOfund Settings
The GOfund Settings record includes many fields that determine how your GOfund site will look and function.
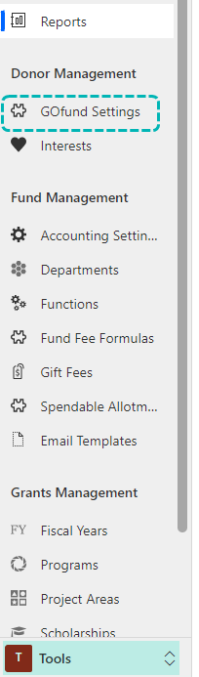
GOfund Settings can be accessed in the Tools area. Only akoyaGO users with an Administrator or System Customizer security role can edit GOfund Settings.
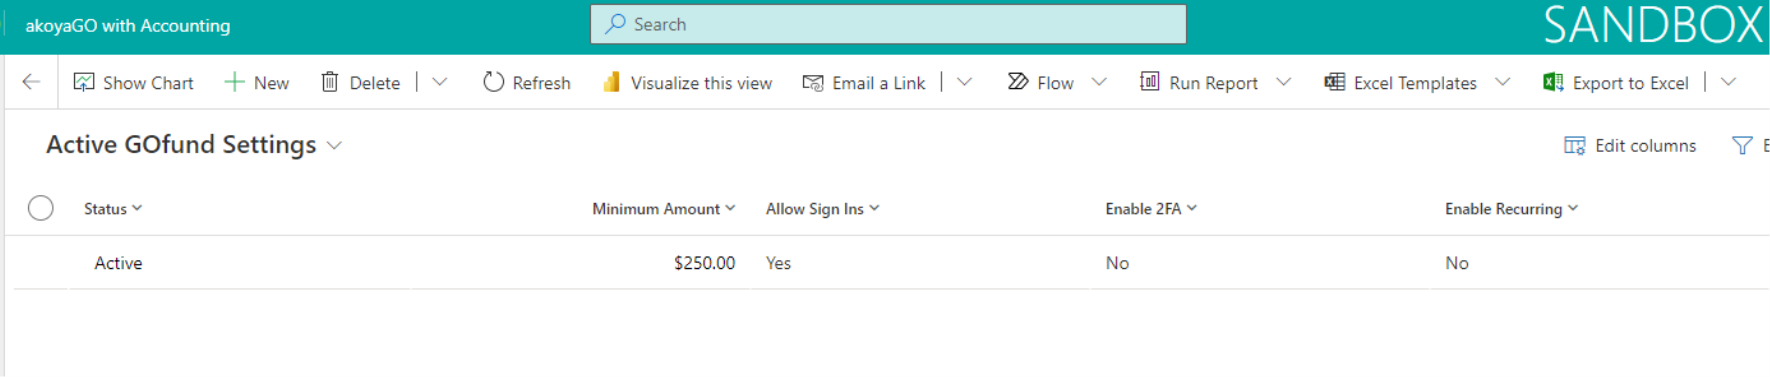
Double-click on the GOfund Settings record. There should only be one settings record available.
GOfund settings include many Label, Subheader, and Helper Text fields.
Label fields allow you to override the default labels in the GOfund UI with your own customized labels. This is optional; if you leave the label fields blank, default labels will be used.
Helper Text and Subheader fields allow you to add customized language to appear under the labels. This is also optional; if these fields are left blank, the section will simply be hidden in the GOfund UI.
The GOfund Settings form is organized into tabs:
GOfund Settings - General Tab
The "General" tab contains fields related to general GOfund settings. Below is an overview of the fields that you will find in this tab, broken down by section.
GOfund URL: This is the URL to your foundation's GOfund User Interface. This link can be shared with GOfund Users, but remember, only Contacts who have Fund Connections will be able to log in. This field will be populated by akoyaGO staff during your GOfund set up. Once data has been added to this field, it will lock
Foundation User: this is a lookup to User. The user listed in this field will be the “From” address for emails sent from GOfund. This is also the person whose name and email address will be listed in the Foundation Staff Contact section of GOfund if the related Fund does not have a Foundation Staff Contact assigned.
It is important that this user has allowed Microsoft to send emails on their behalf. For more information, please see Allow Microsoft to Send Emails on My Behalf.
Enable Fund Statement: Toggle to Yes or No. This feature works in conjunction with the GOfund settings in the Department. Users will be able to view their fund statement if Enable Fund Statement = Yes in both places.
Enable Documents: If Yes, users can view Fund Documents. This setting works in conjunction with a permission setting in the fund connection record (page 4). If Enable Documents = No, no users will be able to view documents, regardless of document location or their permissions in their fund connection record.
Display Funding Opportunities Page: If set to Yes, the Funding Opportunities Page will be displayed in the GOfund UI. Set to no if you would like to hide the Funding Opportunities Page.
Funding Opportunities Label: If the Funding Opportunities Page is displayed, there is an option to change the label. If left blank, it will default to Funding Opportunities.
Sign In
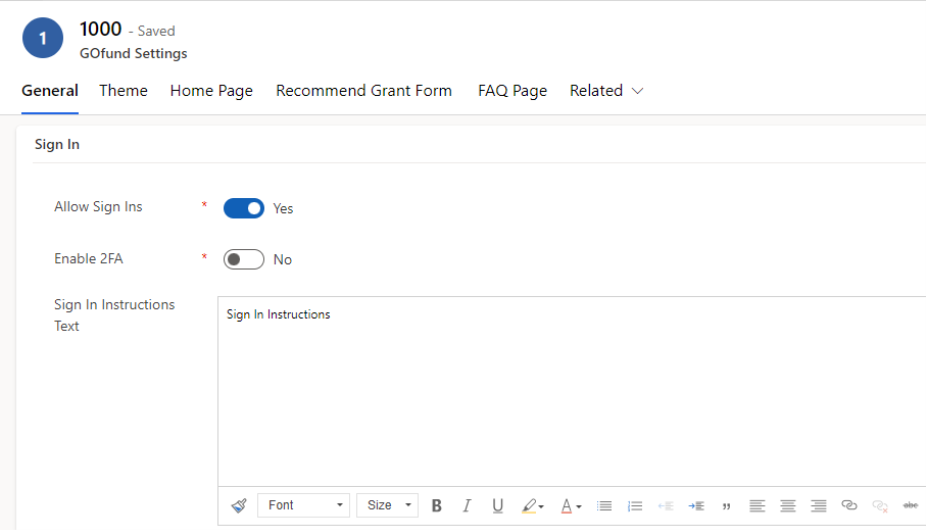
Allow Sign Ins: If No, the sign-in page will be grayed out and disabled.
Enable 2FA: If No, users can sign in with their password alone. If Yes, users will be required to enter a code sent to the email address attached to their Fund Connection’s Contact (Two-factor authentication). The email sent to the user with the code will be added to the timeline of the Contact record. This email is driven by the Email Template GOfund - 2FA Code. For more information on accessing and editing Email Templates, please see: How to Edit an Email Template in akoyaGO.
Sign In Instructions Text: Enter and edit sign-in instructions. These appear under the logo on the sign-in page. Best practice is to type the sign-in instructions directly in this field. When copying/pasting from other apps, original formatting cannot be guaranteed.
Registration Options
In this section, you have the option to Enable User Consent. If YES, this setting will add a required field during user registration that requires them to check a box indicating they agree to the information you can enter in the User Consent Language field. Best practice is to type the user consent language directly in this field. When copying/pasting from other apps, original formatting cannot be guaranteed. This field will appear after they click the link in their invitation email and are taken to the password-reset page.
Password Requirements
Password Required Length: Minimum number of characters required for a GOfund user password in this GOfund tenant. Defaults to 10 if left blank.
Password Required Unique Chars: Minimum number of distinct characters required for a GOfund user password in this GOfund tenant. Set to 0 to disable. If left blank, will default to 0.
Password Require Digit: If set to yes, it will require at least one numeric digit (0-9) in a GOfund user password.
Password Require Lowercase: If set to yes, it will require at least one lowercase letter (a-z) in a GOfund user password.
Password Require Uppercase: If set to yes, it will require at least one uppercase letter (A-Z) in a GOfund user password.
Password Require Special Character: If set to yes, it will require at least one non-alphanumeric character (such as !, $, @. or #) in a GOfund user password.
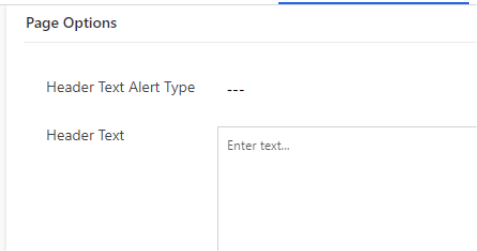
Page Options
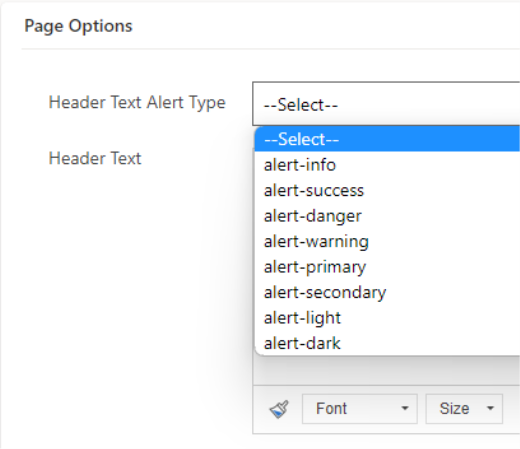
Header Text Alert Type: This option determines how the header text is displayed. Header Text appears at the top of the page, as such:
GOfund Settings - Theme Tab
Customize GOfund with your foundation's branding using the Theme tab of GOfund Settings.
Theme uses a color picker to determine your theme colors. Choose a color by clicking on the field and picking from a grid or gradient. If you know your brand's HEX or RGB color codes, you can enter them in the color picker as well.
Navbar Text Color: updates the text color in the top navigation bar.
Please note you can set the color of the "Make a Grant Recommendation" and "Grant History" buttons on within the Home Page tab (next section.)
GOfund Settings - Home Page Tab
Customize the Home page (if enabled) of your GOfund site using the Home Page tab of GOfund Settings.
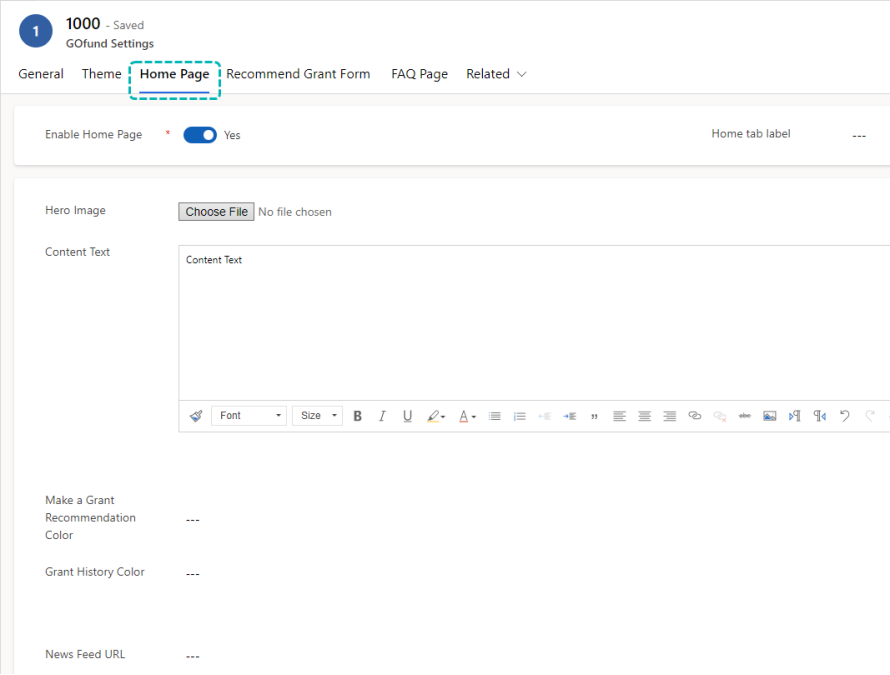
Enable Home Page: Set this to Yes to make the home page accessible to GOfund users.
Home Tab Label: Allows you to set a custom label for the Home button. If left blank, it will default to "Home"
Hero Image: Image at the top of the page. Recommended maximum image width is 1110px.
Content Text: Best practice is to type the content text directly in this field. When copying/pasting from other apps, original formatting cannot be guaranteed.
Home Page Display Grant Recommendation: Controls whether the Grant Recommendation card is shown on the top of the GOfund home page. Navigation access remains separate from this card display setting.
Home Page Display Grant History: Controls whether the Grant History card is shown on the top of the GOfund home page. Navigation access remains separate from this card display setting.
Make a Grant Recommendation Color: Color of the Make a Grant Recommendation button. This needs to be entered in a hex format - Ex. #000000
Grant History Color: Color of the Grant History button. This needs to be entered in a hex format - Ex. #000000
News Feed URL: Insert an RSS feed here. Displays under the grant recommendation and grant history buttons. The minimum RSS format needed is “title”, “link”, “description”, “pubDate”.
GOfund Settings - Fund Summary Tab
Fund Summary settings give you the option to add an alert banner/header text to the Fund Summary page. Any text added will appear under the fund name and above the fund balances.
Display Primary Fund Donor: This field looks at the Primary Fund Donor field on Fund. If this setting is Yes, that name will be displayed on the Fund Summary page. If not, it will not.
Header Alert Type: Select the color for the alert; if blank, no color will appear, as in the example below.
Header Text: Input additional information that you want users to see on the Fund Summary page. Best practice is to type the header text directly in this field. When copying/pasting from other apps, original formatting cannot be guaranteed.
Custom Text
The following fields allow you to provide custom labels within the Fund Summary page. If left blank, all label fields in this section will set to the default. Each corresponding section will only display in the GOfund UI if there is relevant data.
Pending Recommendations Submissions Label: Allows you to set to a custom title for the Fund Summary - Pending Recommendations/Submissions section.
Pending Recommendations Submissions Subheader: Custom text for Fund Summary Pending Recommendations/Submissions section. If blank, the helper area is hidden.
GOfund Settings - Fund Statement Tab
GOfund Settings - Grant Recommendations Tab
The Grant Recommendations tab contains many settings that will control how the "Recommend a Grant" page appears and functions for GOfund users will permission to recommend grants.
Below is a screenshot of the Grant Recommendations tab on the GOfund Settings record in akoyaGO:
These fields affect this page in the GOfund UI:
Below is an overview of all fields on the Grant Recommendations Tab in GOfund settings, grouped by section.
Page Options
Header Text Alert Type: Choose an option. Display is the same as the General tab, but on the Grant Recommendations tab.
Header Text: Text that will be displayed inside the alert ribbon. If enabled, it will appear under the alert ribbon designated in the General tab. Best practice is to type the header text directly in this field. When copying and pasting from other apps, the original formatting cannot be guaranteed.
These banners will appear at the top of the page as such:
Organization Header Text: Text that will be shown on the GOfund Recommendation page for grants to an organization.
Interfund Header Text: Text that will be shown on the GOfund Recommendation page for interfund grant recommendations.
General Settings
Minimum Amount: Required field; the lowest amount a recommender can input. Set to $0 for no minimum.
Customization for Organization Label and Customization for Established Fund Label: These fields allow you to control the language in the 'I would like to grant to' dropdown. If blank, users' options will default to Organization or Established Fund (if interfund grants are enabled).
Grant Recommendation Drafts Navigation Label: Controls label for grant recommendation drafts navigation in GOfund UI. If left blank, will default to Drafts.
Grant Recommendation Drafts Page Header: Controls the header for the Grant Recommendation Drafts page. If left blank, will default to Grant Recommendation Drafts.
Grant Recommendation Drafts Subheader: Controls the subheader (supplemental text displayed beneath Grand Recommendation Drafts) for the Grant Recommendation Drafts page.
Submit Later Button Label: Plain text label for the "Submit Later" button on the GOfund Grant Recommendation page. Applies both to organization and interfund recommendation forms. If left blank, will default to Submit Later. Please note that this only changes the visible button label.
Disable Automated Confirmation Email: If set to Yes, no confirmation email will be sent upon submission of grant recommendations. This is often used if a custom email via workflow should be sent instead of the out-of-the-box Email Template sent via programming.
Recently Submitted Retention Days: The number of days since the grant submissions were recently submitted remains visible in the GOfund Drafts - Recently Submitted section. If left blank, the default value is three days.
Grantee/Recipient Options
Timing of Grant
Timing of Grant
Enable Timing of Grant: If Yes, users can choose whether their grant recommendation is disbursed ASAP, on a specific date, or on a recurring basis. Recurring grants made from GOfund will not automatically create a payment request.
Timing of Grant Label: This field allows you to control the language of this question. If blank and enabled, it will default to 'Timing of Grant'.
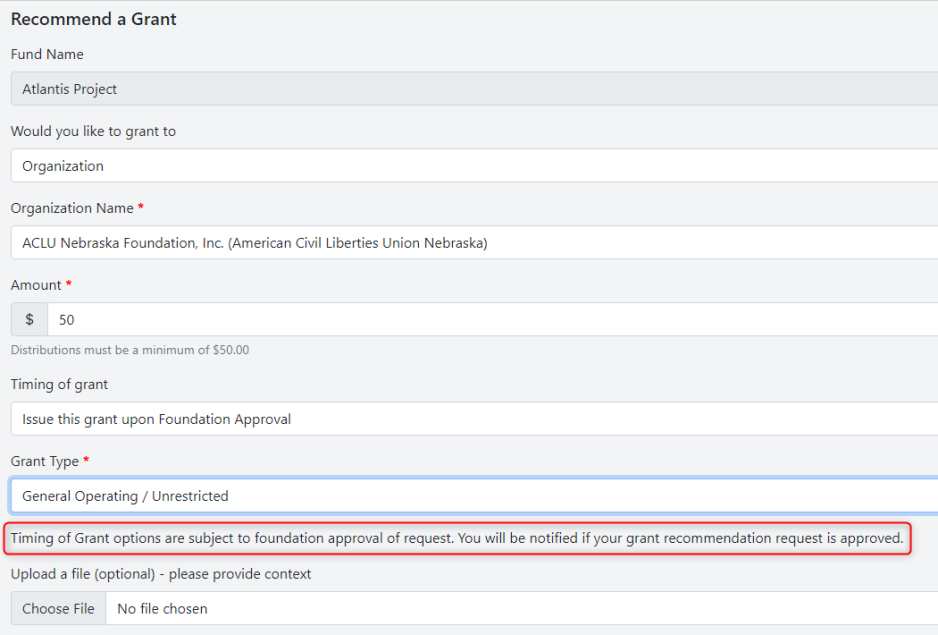
Timing of Grant Helper text: Type instructions for your fund holders here regarding how the options in the Timing of Grant dropdown will work. This text will appear under the Grant Type field in the UI-recommended grant form. (Example below)
Enable Recurring: If Yes, users can recommend recurring grants (scheduled distributions). Recurring grants made from GOfund will not automatically create a payment request.
Enable Recommended Payment Date: This setting allows users to recommend disbursing a grant on a specific date. If Yes, this field will map to the Est. Grant Pay Date field on Request.
Grant Type/Restriction
Enable Designated Giving: If yes, users can specify the grant type (unrestricted vs. restricted). If no, options related to Designated Giving (Grant Type) will not be visible.
Require Grant Type: If yes, the Grant Type question must be answered.
The following fields allow you to set custom labels/text related to Grant Type/Restriction. Any of the fields below can be left blank to use the defaults.
Grant Type Label: This allows you to set a custom label for the "Grant Type" question. If blank, will default to "Grant Type"
Grant Type Restricted Label: Customize what the GOfund user sees for the restricted grant type option. If blank, will default to "Restricted"
Grant Type Unrestricted Label: Customize what the GOfunduser sees for the Unrestricted grant type. If blank, will default to "Unrestricted"
Grant Type Helper Text: Text shown under the Grant Type field when designated giving is enabled on the grant recommendation form.
Additional Options
Amount Helper Text: Text shown under the Amount field on the grant recommendation form. This appears in addition to the system-generated minimum-amount message, when applicable.
Enable Recommendation Note: When Yes, GOfund users will be able to leave a note with their recommendation. This Recommendation Note can be found on the Request that is created in akoyaGO when their grant recommendation is submitted on the Process Tab > Recommendation Info.
Recommendation Note Label: Optional label to customize the Recommendation Note label for GOfund Recommend Grant forms (both to Organizations and Interfunds.) This setting only applies if Enable Recommendation Note = yes. If blank, will default to "Recommendation Note."
Recommendation Note Helper Text: Optional text shown under Recommendation Note question in the GOfund UI. This setting only applies if Enable Recommendation Note = yes.
Enable Comments: If yes, users will be able to submit comments on the grant recommendation. Comments will be mapped to the Comments field on the Project tab of the Request.
Require Comments: if Yes, comments will be required on the form.
Comments Label: Optional label to customize the "Comments" question. This setting only applies if Enable Comments = yes. If blank, it will default to "Comments"
Comments Helper Text: Optional text that will appear under the Comments question in the GOfund UI. This setting only applies if Enable Comments = yes.
Enable Add Dedication: This will be set to Yes by default. To remove the "add dedication" option on the Grant Recommendation form in the GOfund UI, set this setting to NO.
Allow File Upload: If yes, a file upload option will appear; if no, it will be hidden.
Require File Upload: If yes, the form requires a file upload.
File Upload Label: Field label for the file upload. Same position as other field labels on the form. Use the File Upload Label to inform users what to upload or how to upload it.
File Upload Helper Text: Optional text shown under File Upload question in the GOfund UI. This setting only applies if Allow File Upload = Yes.
Enable Anonymous: If Yes, the user will see an Anonymous checkbox option on the Recommend a Grant Form.
Interfund Recommendations
Interfund Recommendations are grant recommendations made to another established fund. The first setting in this section to consider is Enable Interfund Recommendations
This will "turn on" interfund recommendations for this GOfund site, allowing GOfund users with grant recommendation permission to recommend interfund grants. If this setting is set to No, users will not see the option and the following settings in this section will not be relevant.
Optional label to customize the "Gift Fund" question. If blank, will default to "Gift Fund"
Interfund Gift Fund Helper Text: Optional text shown under Gift Fund question in the GOfund UI.
Interfund Amount Label: Optional label to customize the "Interfund Amount" question. If blank, will default to "Amount"
Interfund Amount Helper Text: Optional text shown under Amount question in the GOfund UI.
Interfund Show Grant Date: Setting to display the "Grant Date" question on the Interfund recommendation page. The following two fields are only relevant if Interfund Show Grant Date = Yes.
Interfund Grant Date Label: Optional label to customize the "Interfund Grant Date" question. If blank, will default to "Grant Date"
Interfund Grant Date Helper Text: Optional text shown under Grant Date question in the GOfund UI.
Interfund Show Purpose of Grant: Setting to display the "Purpose" question on the Interfund recommendation page. The following three fields are only relevant if Interfund Show Purpose of Grant = Yes.
Require Purpose of Grant on Interfund: When Yes, the Purpose on an interfund recommendation will be required. Please note this will only be true if the Purpose question is displayed.
Interfund Purpose of Grant Label: Optional label to customize the "Purpose" question. If blank, will default to "Purpose"
Interfund Purpose of Grant Helper Text: Optional text shown under Purpose question in the GOfund UI.
Interfund Show File Upload: Setting to display the "File Upload" question on the Interfund recommendation page. The following three fields are only relevant if Interfund Show File Upload = Yes.
Interfund Require File Upload: When Yes, the File Upload question on an interfund recommendation will be required. Please note this will only be true if the File Upload question is displayed.
Interfund File Upload Label: Optional label to customize the "File upload" question. If blank, will default to "File Upload"
Interfund File Upload Helper Text: Optional text shown under File Upload question in the GOfund UI.
Interfund Show Recommendation Note: Setting to display the "Recommendation Note" question on the Interfund recommendation page. The following two fields are only relevant if Interfund Show Recommendation Note = Yes.
Interfund Recommendation Note Label: Optional label to customize the "Recommendation Note" question. If blank, will default to "Recommendation Note"
Interfund Recommendation Note Helper Text: Optional text shown under Recommendation Note question in the GOfund UI
Interfund Show Comments: Setting to display the "Comments" question on the Interfund recommendation page. The following two fields are only relevant if Interfund Show Comments = Yes.
Interfund Require Comments: When Yes, the Comments question on an interfund recommendation will be required. Please note this will only be true if the Comments question is displayed.
Interfund Comments Label: Optional label to customize the "Comments" question. If blank, will default to "Comments"
Interfund Comments Helper Text: Optional text shown under Comments question in the GOfund UI
Interfund Show Certification Text: Setting to display the "Certification Text" question on the Interfund recommendation page.
Custom Messages
Certification Text: This field is required. If left blank, a checkbox will appear at the bottom of the page with nothing next to it. Example of certification text: “Distribution(s) suggested above are advisory only and do not represent satisfaction or discharge of any pledge or other financial obligation of mine, such as membership fees, or contributions from which personal benefit is derived (e.g., tickets to events, etc.)”. Best practice is to type the certification text directly in this field. When copying/pasting from other apps, original formatting cannot be guaranteed.
Success Submit Page Content: The message that appears after the recommender clicks Submit. Best practice is to type the message directly in this field. When copying/pasting from other apps, original formatting cannot be guaranteed.
Grant Recommendation Form Editor
Additional questions can be added to the GOfund UI Grant Recommendation form as needed. For detailed instructions, please see GOfund Custom Recommend a Grant Form.
GOfund Settings - Grant History Tab
In the Grant History tab, you will find a free text box. Here, if desired, you can put instructions or information for users viewing their grant history. Best practice is to type the text directly in this field. When copying/pasting from other apps, original formatting cannot be guaranteed.
In the UI, it will appear at the top of the Grant History page.
Users can filter by Fund (multi-select), Grant Recipient (any active constituents who have requested payment records for the chosen fund(s) in the "Fund Name" box above), and view a specific date range. Users must click Apply Filter to see filtered results.
GOfund Settings - Gift History Tab
In the Gift History tab, you will find a free text box. Here, if desired, you can put instructions or information for users viewing their gift history. Best practice is to type the text directly in this field. When copying/pasting from other apps, original formatting cannot be guaranteed.
In the UI, it will appear at the top of the Gift History page.
GOfund Settings - FAQ Page Tab
Type and format commonly asked questions from donors and fundholders. This feature does not support in-line images. Images will not render correctly. Best practice is to type the content directly in this field. When copying/pasting from other apps, original formatting cannot be guaranteed.
GOfund Settings - Donations Tab
IMPORTANT: Before enabling donation acceptance in GOfund, ensure you set up a Stripe account for your organization. Follow the steps in the Stripe setup Knowledge Article.
After your Stripe account is set up, you can enable donations in GOfund by toggling on the Enable Donations setting. When on (Yes), the GOfund user will see a Donate button in the Fund Summary.
Other donation settings include:
Customization for Donate label: enter alternate text for the Donate button.
Enable Dedication: when enabled, GOfund users will see the "Add Dedication" option on the gift form in GOfund. When set to "No," the "Add Dedication" option is hidden.
Enable Add New Donor: when enabled, the "Add New Donor" option is shown in GOfund checkout. When disabled, only existing donor records can be chosen. If none exist, the transaction uses the signed-in GOfund User's (Contact's) name, email, and address.
Enable Designated Giving: This setting enables the user to add a Purpose to the gift.
Enable Recurring Donations: When on (Yes), users will be able to establish a recurring gift. For more information, see the Recurring Donations Knowledge Article.
Link to GOdonate: This setting enables the Give to Another Fund menu option. This is a link to your GOdonate site.
Customization for GOdonate Link Label: input alternate text for the 'Give to Another Fund' option.
Donation Complete HTML: Design the message the user sees upon completing a donation. Best practice is to type the message directly in this field. When copying/pasting from other apps, original formatting cannot be guaranteed.
Upon submitting a donation, the user will receive an email confirming their gift. The email is created using the "GOdonate - Donation Confirmation Email" template. For more information on accessing and editing Email Templates, please see: How to Edit an Email Template in akoyaGO.
GOfund Settings - User Profile Tab
Enable User Profile Change Requests: this field defaults to No. Set this field to Yes to allow users to use the "Change Requests" feature, which requires approval from an akoyaGO user before User Profile Changes are applied to the related contact record in akoyaGO. More information on Change Requests can be found here: Change Requests.
Below that setting, you will also find several fields that let you modify the language surrounding the change request process.
Profile Header Text: This is the text the user sees at the top of the screen when viewing their profile. Best practice is to type the text directly in this field. When copying/pasting from other apps, original formatting cannot be guaranteed.
Profile Submission Confirmation Message: The text the user sees immediately after submitting a profile change request. Below is the default text that will appear if this field is blank.
Profile Change Request Already Active Message: This is the text the user will see when viewing their profile while an active change request is pending approval or rejection. Below is the default text that will appear if this field is blank.
Please note that if you choose Enable User Profile Change Requests, the GOfund User will receive an email when a change request is submitted and when it is complete.
These emails are driven by the following Email Templates:
GOfund User Change Requested Notification
GOfund User Change Request Completed Notification
If you are using User Profile Change Requests, make sure to review these Email Templates to align with your organization’s branding and/or messaging. For more information on accessing and editing Email Templates, please see: How to Edit an Email Template in akoyaGO.
Email Helper Text: Optional helper text that will appear in the GOfund UI beneath the Email field on the GOfund User Profile Page
Note Helper Text: Optional helper text that will appear in the GOfund UI beneath the Note field on the GOfund User Profile Page
Submitting a Change Request
The user should navigate to their Profile by opening the carrot next to their name in the top right corner of the page and selecting Profile.

This will take them to a page with relevant fields populated from their akoyaGO CRM Contact record. All fields will be unlocked.
To make a change, the user should update the field to the desired value and click Save in the bottom-right corner.
IMPORTANT: If the user updates their email address and the change is approved. They will need to log in to GOfund with the new email address going forward.
The Note field is optional and allows the user to elaborate on their need for changes. This field will clear after their change request is approved or rejected.
In the Tools area of akoyaGO CRM, there is a table called Change Requests. This is where you can find all active and inactive Change Requests. When a user submits changes to their profile, a change request record will be created in this table. You can also find active change requests in the GOfund Usage Metrics dashboard.

GOfund Settings - Charts Tab
For instructions on setting up and using GOfund charts, please review the GOfund Charts Knowledge Article.
GOfund Settings - Documents Tab
Uploading a document to GOfund Settings makes it visible to all GOfund users if the Enable Documents setting = Yes in GOfund Settings.
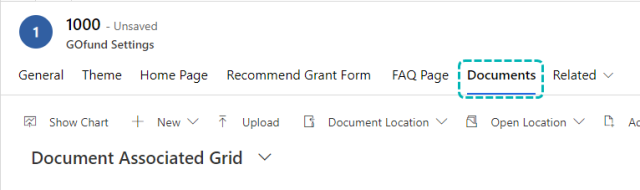
More information on utilizing Documents in GOfund can be found later in this Knowledge Article in the Documents section.
Departments - Fields Related to GOfund
The Department also contains GOfund settings. Navigate to the Departments table in the Tools area. Select a department, and click the GOfund tab.
These settings will override the general GOfund settings where applicable. If these settings are blank, your GOfund site will default to the main GOfund settings.
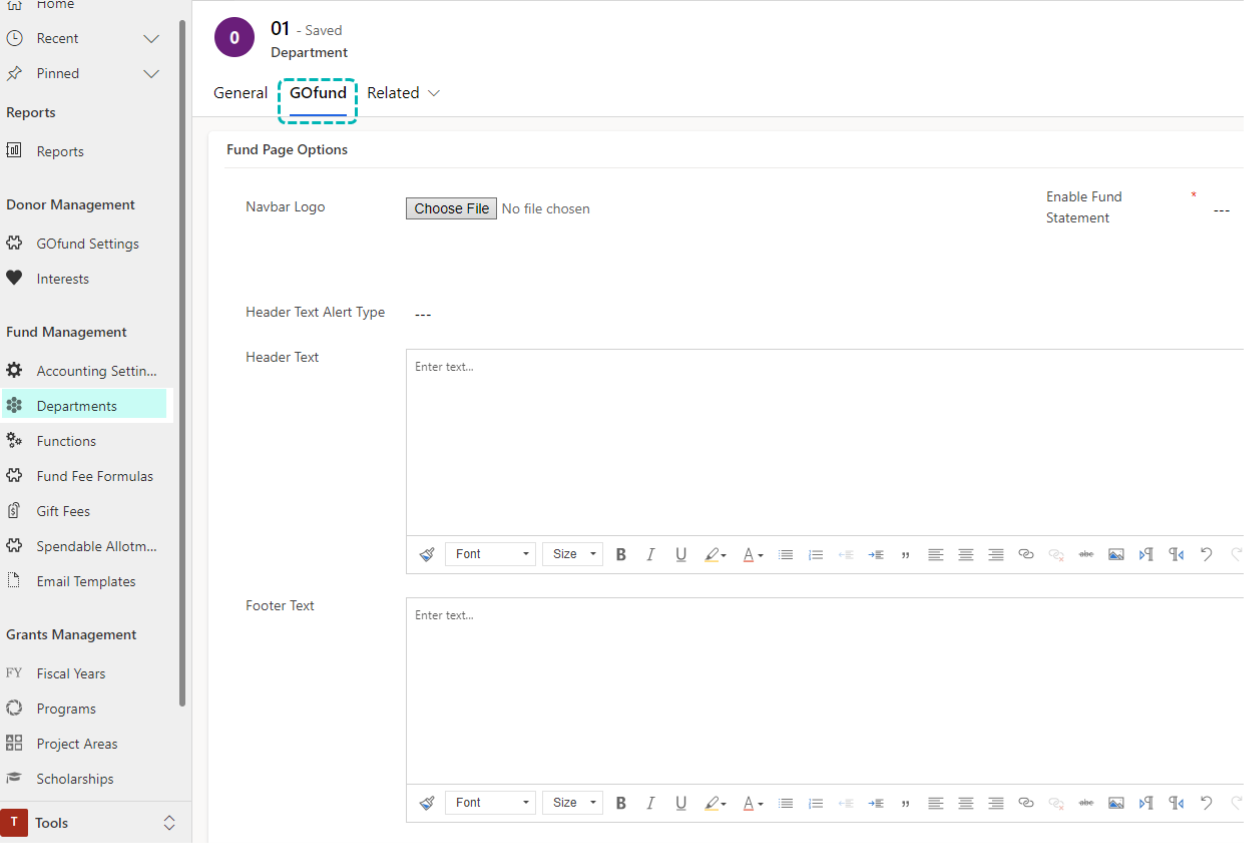
These settings will apply to the funds within the department.
Funds - Fields Related to GOfund
Ignore Spendable Limit: If Yes, this setting allows GOfund users to submit grant recommendations that exceed the fund's spendable limit.
GOfund Spendable: On the GOfund section (Summary tab) of a Fund record, there is a calculated field called GOfund spendable. This is the field that GOfund uses to display as the spendable amount.
This field's calculation is the fund's Spendable Amount less all Pending Requests or Interfunds that have not yet been sent to accounting. Because the GOfund Spendable includes pending Requests and Payments, it may be lower than the fund's true spendable balance (found in the Net Asset Detail section of the fund). This will prevent fundholders from making grant recommendations exceeding the fund's spendable amount before the foundation has a chance to process Requests and Payments.
Total Uncommitted Net Assets: This is a calculated value. This amount is Total Net Assets minus Requests Pending minus GOfund Recommendations with Request status Pending. When the Ignore Spendable Limit setting in Fund is set to Yes, it will serve as the upper limit for granting recommendations. As in, users cannot recommend a grant for more than the amount in this field.
Hide Spendable Balance in GOfund: If Yes, this setting will hide the fund's spendable balance in the GOfund UI
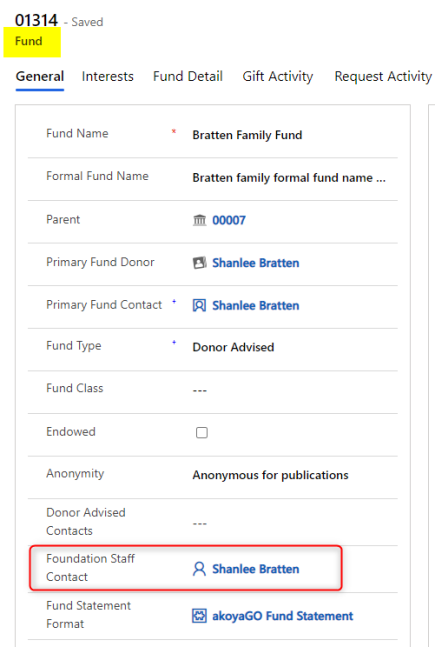
Fund Statement Format: In each Fund record, a field named Fund Statement Format exists. Please be aware that the fund statement layout selected in this field will determine the layout of the fund statement in GOfund. If you do not put any information in the ‘Fund Statement Format’ field, the fund statement shown in the Donor Portal will be the default fund statement in Business Central.
For more information, please see the Fund Statement Layout Knowledge Article.
GOfund UI
GOfund UI is the interface that the donors and fundholders will interact with.
Upon logging in, GOfund will present its home page (if enabled). Fund selection, Grant History, and the Newsfeed will be shown on the Home page. Also seen will be the hero image, header text, and footer text, as defined in your GOfund Settings.
At the top of the page will be menu options such as Home, Grant History, Gift History (downloads are limited to the first 1,000 records), and FAQ. Selecting a fund could potentially change these options depending on the permissions you have for that fund.
When navigating GOfund, we recommend starting by selecting a Fund. Doing so allows the site to show you relevant information for the fund you are interacting with.
Contact information is displayed by clicking "Contact Us" in the header:
\
Or by clicking Contact Us in the page footer:
The page pulls information directly from akoyaGO CRM. The contact person (staff member) is listed under the selected fund’s Foundation Staff Contact.
If no Foundation Staff Contact is listed for the selected Fund, the contact person is the Foundation User in GOfund Settings.
The address and organization details are derived from the linked Foundation Constituent in the related Department's Foundation Constituent.
If there is no Foundation Constituent listed for the related Department, no address/organization information will be displayed.
Below is a screenshot of the "Contact Us" page in the GOfund UI:
If a user has only one Fund Connection, they will be automatically directed to that fund’s summary and will not be prompted to select a fund.
Below is an example of a GOfund user with two Fund Connections:
After selecting a fund, here is an example of the Fund Summary page:
At the top of the page, there are three cards displaying the Fund Balance, Spendable Balance (if Hide Spendable Balance in GOfund is not selected for the fund), and Primary Fund Donor or Contact (if Display Primary Fund Donor is set to Yes on GOfund Settings).
The Fund Balance is driven by the Total Uncommitted Net Assets field in akoyaGO CRM. The Spendable Balance is driven by the GOfund Spendable field in akoyaGO CRM. Both of these values take pending items into account.
Below the cards, Pending Recommendations, Pending Interfunds, Recent Grant Payments, Recent Contributions, and/or Scheduled Distributions will be displayed. Custom labels and subheaders for all sections on the Fund Summary page can be added in GOfund Settings.
The Pending Recommendations/Submissions section is populated from the System View Pending Fund Disbursements accessed through Requests. The Recent Gift and Grant Payments sections show the three most recent entries regardless of date. Pending Recommendations and Scheduled Distributions will show the five most recent records. So, if the fund has not had a gift or requested a payment in five years, that will still be reflected in these sections even if the entries are not technically “recent”.
When a subgrid is empty, it will be hidden from the page. For example, if the fund has no scheduled distributions, that subgrid will not be visible.
At the top of the Fund Summary page, you will see the Primary Fund Donor. This corresponds to the Primary Fund Donor field in the CRM Fund record.
If the Primary Donor is blank in the CRM Fund record, the fund’s primary contact will be listed, which corresponds to the Primary Contact field in the Fund record.
Click on the pencil icon next to the fund name to view or edit the fund details. Editable fields include the formal fund name, the anonymity status, and the purpose. The fund name, fund code, fund type, fund class, endowed status, and establishment date are not editable.
If the GOfund User has permission, a fund statement can be run from any page by clicking the "Fund Statement" button.
When opening the fund statement, the date range defaults based on the Default Start Date Mode specified in GOfund settings.
The GOfund User can adjust the date range (as allowed in GOfund Settings) and click Apply Filter to see the new range.
Fund statements can also be run in bulk if the fund is part of a fund group. The fund group is determined in the CRM fund form. Check the box "Run the Fund Statement as a Combined Statement for all funds in the fund group" to see the consolidated statement. NOTE: The logged-in user must have a GOfund connection to all funds in the group to run the consolidated fund statement.
Recommend a Grant in GOfund UI
To recommend a grant, first select a fund. Then, click the Recommend a Grant button next to the fund name.
Clicking the button will drop down two options (if enabled): to make a grant recommendation to an organization or to make an interfund grant recommendation to another fund.
You can change the out-of-the-box labels in GOfund Settings. Depending on the choice, the appropriate form will appear. For more information on customizing the grant or interfund recommendation form, see the Custom Grant Recommendation Form knowledge article.
Recommending to an organization
Organization Name: Choose the recommended grant recipient
Search the List: This list is determined by a system view on Constituent called GOfund Grant Recommendation Eligible Constituents. Users with the System Customizer Security Role can edit this System View to filter the listed organizations. For more information, see Updating GOfund System Views that Display in GOfund UI
Type to search the list. Search includes the AKA field on the constituent. Additional information about the organization, including its address and tax ID, will appear. This information is populated from its Constituent record in akoyaGO CRM.If the user's search did not return the desired results and the GOfund Settings allow it, the user can create a new organization either via the Pub 78/CRA search or manually. On the search dialog, they can click Search Charity Databases or Create New Organization. When either is utilized, it will create a new constituent record in your akoyaGO CRM and set this constituent as the Request Applicant and Payee. Reminder: the following options are determined by the settings in the GOfund Settings.
Search Charity Databases: grant recommendations will be disabled for organizations whose status is anything but 'Verified Nonprofit' (Pub 78) or 'Registered'(CRA). This is to prevent users from making grant recommendations to organizations that are revoked or not verified.
Create New Organization: If the user chooses to create a new organization manually, they will be presented with a form where they can enter information about the organization. Name and address are required; additional information such as the Tax ID and organization's Primary Contact can be entered if the GOfund user has this information.
Users can also suggest a new address for an existing organization if what they see is incorrect by selecting Yes to the question, 'Has the organization's address changed from what is displayed above?' If a new address is input here, it will map to the Process tab on the corresponding Request.
Add dedication: users can optionally add a dedication to honor or remember someone. Dedication information will map to the Process tab of the corresponding Request.
*If you would like to remove this option for your GOfund users, see information about the Enable Add Dedication field found in the GOfund Settings section of this Knowledge Article.
Amount: Enter the dollar amount; be mindful of the minimum amount. Also, be mindful of the fund’s spendable amount. If your recommended grant amount is greater than the fund’s spendable, you will be unable to submit the grant recommendation. The amount entered here will populate the Recommended Grant Amount field on the Request record in CRM. Amount does not have to be a whole number; cents are allowed to the tenth place.
Timing of grant: choose from the dropdown (ASAP, on a specific date, or on a recurring basis). Please note that the ASAP and Specific options map to the Est. Grant Pay Date on the Payment record.
Issue this grant upon foundation approval = Today’s date
Specified = Choose a date
Recurring = Scheduled Distribution. Recurring grants made from GOfund will not automatically create a payment request.
Grant Type: Choose General Operating/Unrestricted or Restricted. If Restricted, an additional Purpose field will appear.
Purpose of grant: Describe the purpose of the grant. This field is required and maps to the Purpose field in the Project tab of Request. If the User chose General Operating/Unrestricted as the Grant Type, that will appear in the purpose field. 850 character limit.
Upload a file: click Choose File to select a file from your local drive. This file will appear in the request timeline in akoyaGO CRM. Documents can be found in the request timeline and on the Documents tab of the Request. The PDF of the submitted Grant Recommendation is available on the Request's Documents tab. An automated document flow moves attachments to your SharePoint site.
Recommendation Note: optional, notes pertaining to this grant recommendation. Notes will be mapped to the Process tab of the corresponding Request.
Comments: additional comments pertaining to this grant recommendation. Comments will be mapped to the Project tab of the corresponding Request.
Certification text: check to acknowledge, this is required.
Recommending to an Established Fund
The user will choose Established Fund from the Recommend a Grant drop-down.
Gift Fund: choose from the list. This list is populated by the GOfund Interfund Funds System View in akoyaGO CRM. If you would like to adjust this list, please see Updating GOfund System Views that Display in GOfund UI for more information.
Amount: dollar amount, please be mindful of the minimum required amount. Amount does not have to be a whole number; cents are allowed to the tenth place.
Date Requested: The date input here will map to the Interfund Grant Date in the Interfund record in CRM
Purpose of Grant: The text input here will map to the grant and gift purpose fields in the Interfund record in CRM. 850 character limit.
Verification text: check to acknowledge, this is required.
Click submit to send your grant recommendation to the foundation. You’ll be redirected to a page where you can choose to recommend another grant or go back to the Fund Summary page. Click an option or navigate to a different area using the top menu. Grant recommendations that have NOT been processed (sent to accounting) will retain the Folio/Payment Status of 'Recommended'.
For foundation staff, an Interfund Grant record will be created with the information from the recommendation populated. Once the Interfund is processed and sent to accounting it will appear in the Requests table.
PDFs of submissions and any attached files to the recommendation will appear in the Request's Documents tab.
In the CRM, the interfund grant has a field called Grant Recommender that will populate with the contact record of the user who submitted the recommendation.
Email confirmation: The recommender will receive an email confirmation only after the foundation processes the interfund.
Foundation Staff Email Notification: There is a workflow called GOfund - Internal Notification for Interfund Grant Recommendation in your akoyaGO system that will need to be edited and activated. The body of the email can be edited to suit your needs, but out of the box, it will contain a link to the interfund record, the grant recommender, the amount, the gift and grant funds, and the purpose.
To edit the workflow, add it to your custom solution and make changes.
Detailed steps can be found here:
1. Adding Components to Custom Solution
2. Creating a CRM Workflow Process - Begin at the Set Process Properties Section
Once the workflow is active, it will send an email to a designated staff member whenever an Interfund Grant is recommended.
Upon submission, the GOfund Spendable for the Grant Fund will decrease in real time and should be immediately observable by the user.
Submitting a Grant Recommendation
For both organizational and interfund grants, the user can choose "Submit Later" or "Submit Now".
Submit Now will submit the recommendation immediately.
Submit Later will save a draft recommendation, where it will remain until the user submits it or deletes it. Draft recommendations can be accessed in the upper-right corner of the page header. From here, users can either submit all items at once, submit one at a time, or edit or delete an existing recommendation.
Grant Recommendation Emails
After recommending a grant, the recommender will receive an email confirmation. This email will be sent to the grant recommender upon submission for both recommendations to organizations (Requests) and to other funds (Interfunds).
This email is sent via programming upon submission and will reference two Email Templates:
1. GOfund - Grant Recommendation Confirmation Email
2. GOfund- Grant Recommendation (Batch) Confirmation Email
Make sure to review these Email Templates and make any changes to suit your organization and your donors' needs. For more information on accessing and editing Email Templates, please see: How to Edit an Email Template in akoyaGO.
IMPORTANT: For Grant Recommendations not submitted through GOfund (meaning an akoyaGO user manually creates a Request or Interfund), an email will be sent by the Non-GOfund Grant Recommendation Acknowledgment Process Workflow. This workflow is triggered upon creation of the Request if the GOfund Recommender field contains data and the Request Source does not equal GOfund. For donor-advised Interfunds that are not submitted through GOfund, the confirmation email will not be sent until the Interfund is processed and the associated Request is created. The email will not send if this field is backfilled after the request is created.
Exclude/Include Funds in GOfund UI
The funds that appear in the list when a user recommends a grant to a fund come directly from the GOfund Interfund Funds view in akoyaGO CRM.
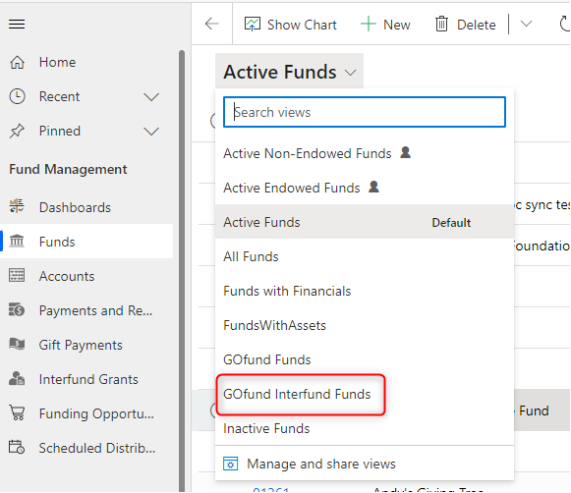
To include or exclude funds, a System Customizer can edit the filters of the System View. For more information, please see Editing System Views.
View Grant Recommendations
For information on viewing grant recommendations in akoyaGO CRM, please see Processing Requests, Interfunds, and Scheduled Distributions Created through GOfund.
Grant/Gift History
Upon opening Grant/Gift History, the date range will automatically be filtered to the year-to-date.
Grant History and Gift History are based on System Views in akoyaGO. For more information on these System Views, please see Updating GOfund System Views that Display in GOfund UI
GOfund Users can interact with the data on the Grant and Gift History pages. For example, a GOfund user can select multiple funds (if they have multiple fund connections), filter by Grant Recipient, and change date filters. If they want to clear their filters and reset the screen back to how it was when they navigated to it, they can click Reset. Upon clicking Reset, the Fund Name filter may clear. Users can also search the Grant/Gift History table by keyword.
Users can also access Grant History or Gift History by clicking View all on the Fund Summary page (a limit of 1,000 records is viewable at one time).
Once on the Grant or Gift History page, GOfund users can export gift and grant history to Excel (up to 1,000 records per export). Adjust the filters as desired and click Export Excel. The columns in the Excel Exports are driven by System Views, which can be customized by a System Customizer user as needed. For more information on these System Views, please see Updating GOfund System Views that Display in GOfund UI
From Grant History, users with the necessary permission can click "Repeat grant" to create a new grant with the same Fund, Payee, and Amount. This functionality applies to grants to organizations and to established funds (interfunds).
If a user attempts to repeat a grant to an inactive fund, they will not be allowed to proceed and will receive an error message.
Documents
Clicking the menu option Documents will show the user all documents for any/all funds for which the user has document permission, plus any site-wide documents uploaded from the GOfund settings.
To upload fund-specific documents, first go to your SharePoint site and add a subfolder to the fund folder called “GOfund Documents”. This folder name is case sensitive; make sure it is formatted exactly as written in the previous sentence.
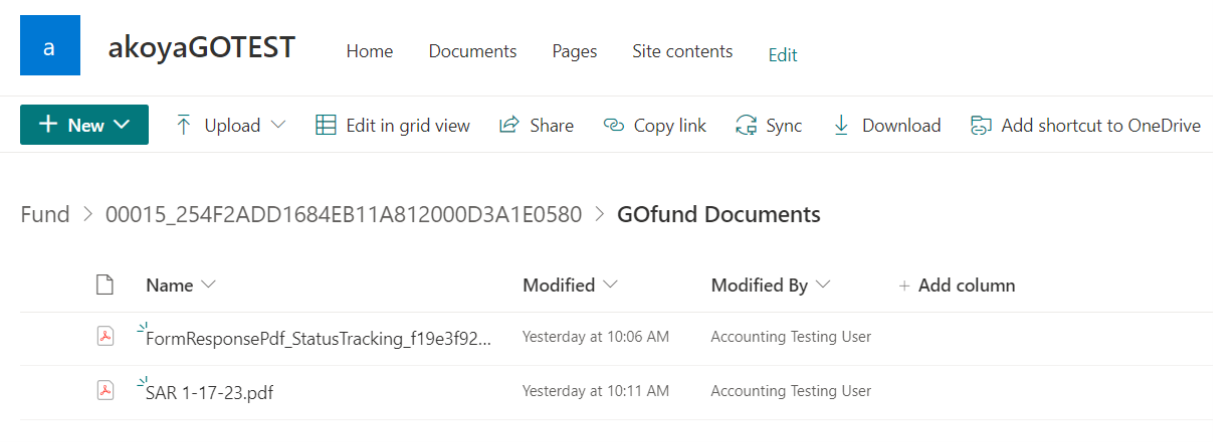
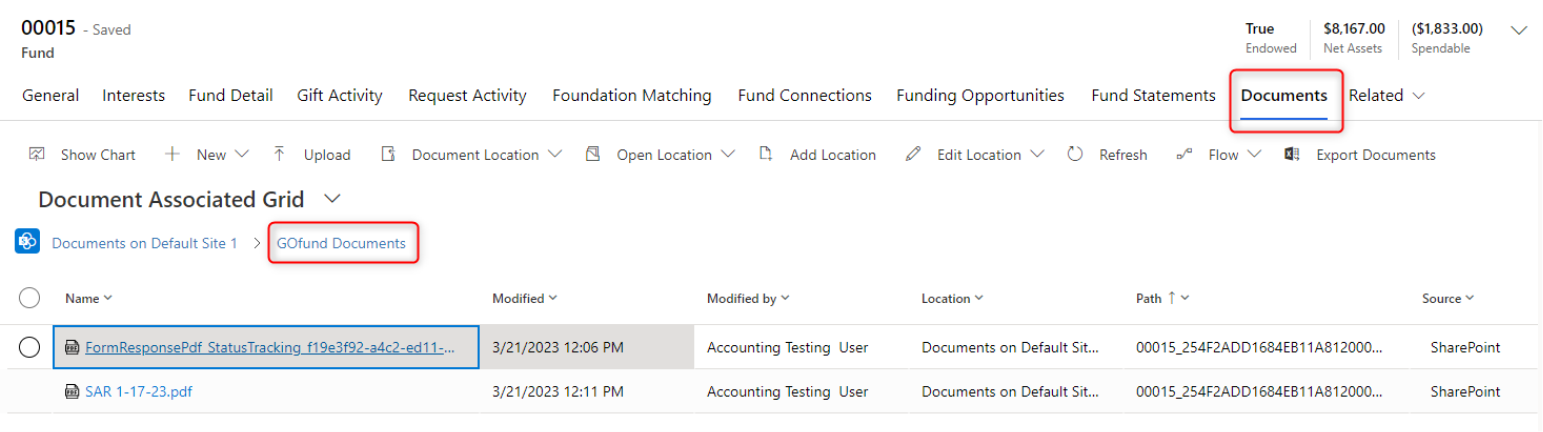
After this folder is created, you can add documents from the Fund record in CRM. And be careful not to add anything that should not be seen by GOfund users to the GOfund Documents folder. Documents you don’t want GOfund users to see can be added to the overall fund folder.
Donations in GOfund
User Experience
The following outlines the user experience of donating on GOfund.
From any page in GOfund, the GOfund user can click "Donate." This button can be relabeled in GOfund Settings as needed:
A dialogue box will appear. Enter the amount (no dollar sign) and choose whether this donation will be unrestricted or a designated purpose. If a designated purpose, you will be prompted to enter a purpose.
If this gift is in memory/honor, click Add dedication. The form will expand to include memory/honor fields. Choose in honor or in memory, enter the person’s name and address. Click Continue.
If recurring gifts are enabled for this GOfund site, choose the recurrence option for the donation.
If this is not a one-time donation, confirm the Next Occurence date is accurate. Optionally, an End Date can also be entered.
Select the donor who is giving this gift.
*If only one matching donor record exists for this GOfund user, GOfund will automatically select the donor profile so the GOfund user does not need to make an unnecessary selection.
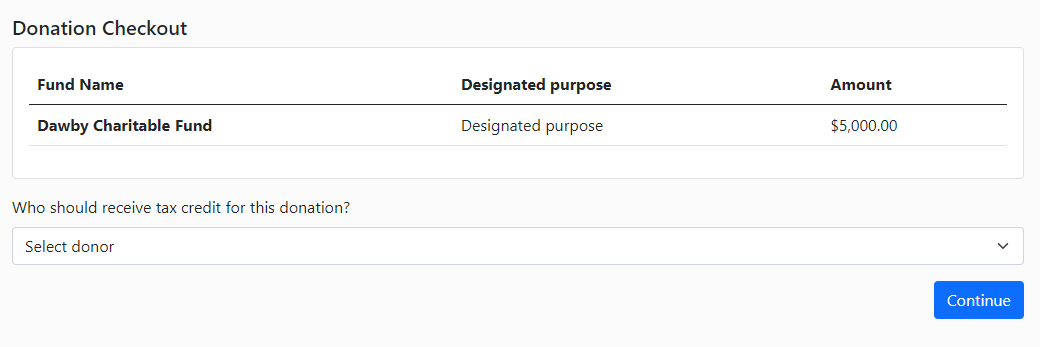
If you don’t see the donor you want in the dropdown, click Add new donor and fill in the form accordingly. (This option will only appear if the foundation has allowed GOfund Users to Add New Donors.)

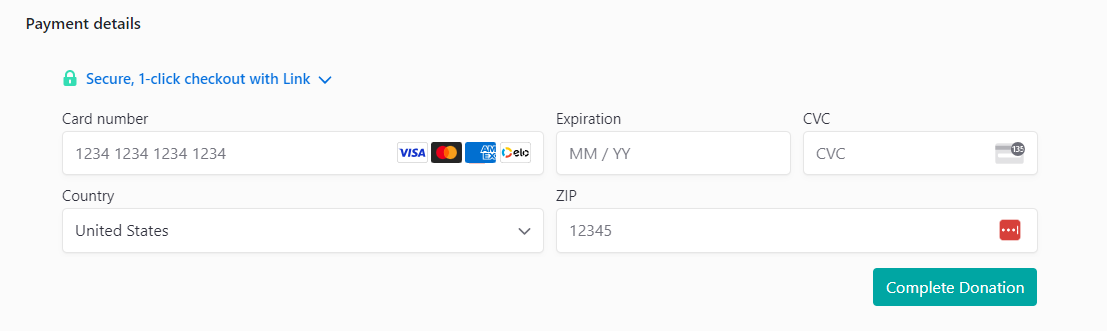
Check out. Enter your credit or debit card information and click Complete Donation.
Donation processing
Once a donation is completed, it becomes a GOdonate transaction record. GOdonate Transactions is a table accessible in the Donor Management area.
A successful donation will have a status of Completed and a Payment Status of Succeeded. For more information, please see the Processing GOdonate Transactions section.
Suggested Routine Maintenance
Regularly reviewing GOfund settings, language, and customizations ensures configurations remain aligned with evolving organizational needs, supports a consistent user experience, and helps identify any outdated or unintended setup changes over time. Below are akoyaGO recommendations.
Monthly
- Alert Banners
- Email Templates & Signatures
Quarterly
- FAQs
- Foundation User (GOfund Settings)
- Foundation Staff Contact (Fund)
- GOfund Logs
- Donor Portal Access (GOfund) Fund Connections
- End Dates - do any need to be deactivated?
- Permissions
Annually
- General Site Verbiage
- System Views that display in GOfund UI
- Documents
- Site Wide
- Fund Specific
- Comprehensive review of GOfund Settings
- Department specific settings (GOfund tab on Department record)
- Fund specific settings/data
- Ignore Spendable Limit
- Hide Spendable Balance in GOfund
- Fund Statement Format
- Primary Fund Donor/Primary Fund Contact