

Revised 01/07/2026
Marketing Lists
Marketing Lists provide a way to group constituents and contacts so you can communicate with them through newsletters, promote events, and send updates in bulk.
Mailing Lists also allow you to communicate with a group of people or organizations. For a comparison of Mailing Lists vs Marketing Lists, please see: Mailing Lists vs Marketing Lists KA.
Types of Marketing Lists
Marketing Lists can be found in the Tools area under Mailings:
There are two ways to organize your Marketing Lists:
Static Marketing Lists- Members are assigned manually. Most often used when changes to member’s records won’t affect the Marketing List. An example of a Static list could be “2023 Board Members.”
Dynamic Marketing Lists- Defined by chosen filters, including all records that fit the filtered criteria. Members may fall off or be added to the list based on changes to their records. An example of a Dynamic list could be “Donors with a Total Commitment over $10,000” or "Grantees This Year."
Click New+ in the command bar.
- Name: enter a brief description of the list
- List Type: choose Static or Dynamic
- Targeted At: choose whether the marketing list is for Constituents (Account) or Contacts (Contact).
**Note Marketing Lists can only be targeted at a group of Constituents OR Contacts, not a combination of the two. Marketing Lists cannot target a group of Donor records. You can choose to target a group of Contacts or Constituents who are also Donors, but you will not be reaching the Donor record through a Marketing List.
Click the Save button.
Adding Members to Static Marketing List
To add members to the Marketing List, select the Members tab and click Add in the subgrid.
Look up a contact by name or click on the Magnifying Glass icon to show a full list. Click Add.
You can also create a new contact by clicking the + New Contact button.
Adding Members to a Dynamic Marketing List
Once a dynamic marketing list has been saved, click on Manage Members.
When filtering for members in a dynamic list, you have a few options:
- In the “Look for” field, select a table to base the filters on (Contacts, Donor, etc.) You can then choose to select a “Use Saved View” if there is a specific view within the table you’d like to work from. This will automatically pull in all the filters from the saved view. You can also choose to add more filters once the view has been pulled in.
- After selecting the table to base the filters on, you can forego a saved view and start adding new filters from the same window. You can use several filters related to the table in the “Look for” drop-down, as well as filters stemming from a separate table.
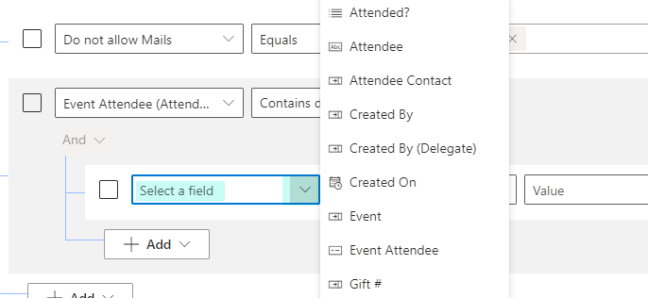
In the example above, the 3rd filter has been directed to pull in a filter from a separate table (Event Attendee.) Instructions on how to do this can be found below:
- Click on the +Add button and select Add related table
Choose the table that will contain the filter you are looking for
Choose the field from the table and filter in a way works best for your list
After all the filters you need are set, click on the Find button. If you do not get the results you anticipated, click on Back to Query and adjust your search parameters. If the query brought back the results you expected, click on Use Query.
Click on Save to save the query for your member list.