Revised 01/07/2026
bank account reconciliation
INTRODUCTION
Before guiding through the Bank Reconciliation process, we want to give our recommendation for posting Bank Deposits. Because of the way that the new Bank Reconciliation form matches transactions, we strongly recommend that you toggle on the “Post as Lump Sum” option when filling out a Deposit form.

This will ensure that the list of transactions in Business Central more closely matches the transactions from your bank statement. Without this option, you may need to make more matches manually.
PREPARATION
Only accounts defined as “Bank Accounts” in Business Central can be reconciled using the following instructions. To verify which accounts meet the criteria, select Cash Management, then choose Bank Accounts.

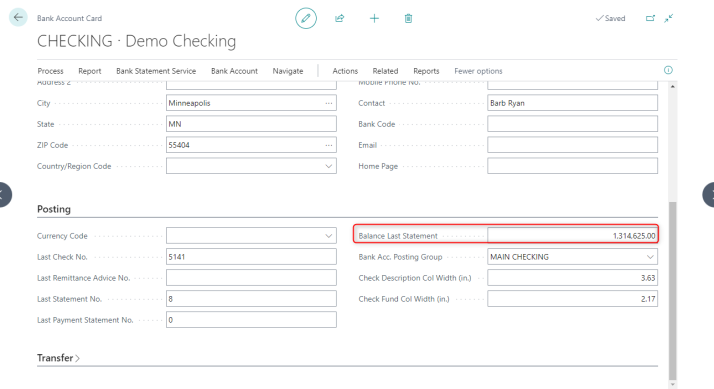
Before the first reconciliation of any bank account, the "Balance Last Statement" (the ending balance of the most recently reconciled period) must be entered. To do this, open a Bank Account record and scroll to the Posting section.
START A NEW RECONCILIATION
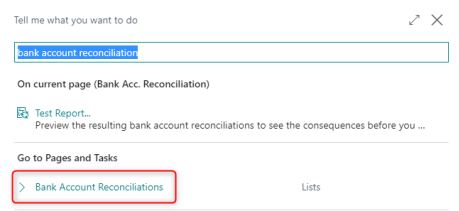
To start a new reconciliation (or re-open a saved reconciliation in the process), search for “Bank Account Reconciliations.”
*Important note: Before the 2023 form change, the entity name was “Bank Reconciliations.”
Click “Process”, then select “New.”
(To continue work on an existing reconciliation, select an existing record by clicking on the “Bank Account No.” for that record.)

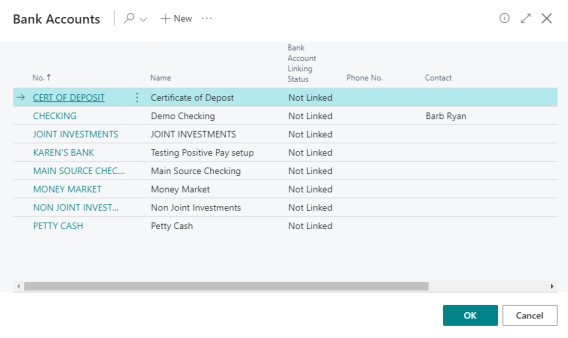
Choose the bank account to be reconciled.
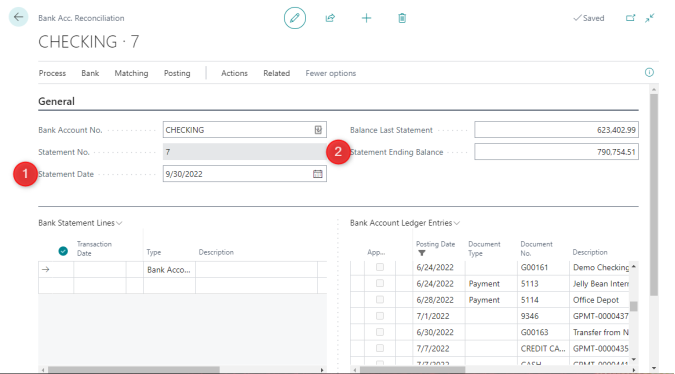
- Enter the following data in the General section:
- Statement Date – The ending date of the bank statement. (Bank Account Ledger Entries are automatically listed through the defined Statement Date)
- Statement Ending Balance – The ending balance according to the bank statement
- Balance Last Statement − Populated automatically from your last completed bank reconciliation for this account
Bank Statement Lines (left) represent the data on your bank statement.
Bank Account Ledger Entries (right) are transactions that have been posted in Business Central.
POPULATE BANK STATEMENT LINES
The Bank Statement Lines section of the form should reflect the transactions as they appear on your bank statement. These can either be populated manually by typing them in or automatically by using the Suggest Lines function.
Alternatively, this section can be populated by importing a .CSV file provided by your bank.
Suggest Lines
- Choose the “Suggest Lines” action.

- In the Starting Date field, enter the earliest posting date for the ledger entries to be reconciled.
- In the Ending Date field, enter the latest posting date for the ledger entries to be reconciled.
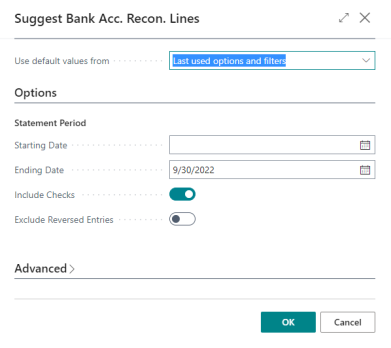
(Typically, the ending date will match the date specified in the Statement Date field. However, if you want to reconcile transactions for only part of a period, you can enter a different ending date.)
IMPORT BANK STATEMENT LINES
To enable the importing of bank statements as bank feeds, you must first select the bank statement import format.
To reconcile a bank account by importing a bank statement:
- Select Bank > Import Bank Statement.
- Select Choose… to locate the file and then select the Open button to import the bank transactions into the Bank Statement Lines section of the Bank Acc. Reconciliation page.
MATCH TRANSACTIONS
The Bank Acc. Reconciliation page offers an automatic matching function. The matching process is determined based on transaction descriptions, posting dates, and amounts.
When choosing to “Match Automatically,” you will be prompted to input a Transaction Date Tolerance. This prompt will determine what time frame the system should look for matches. We recommend using a large number, like 365, for the broadest search of transactions.
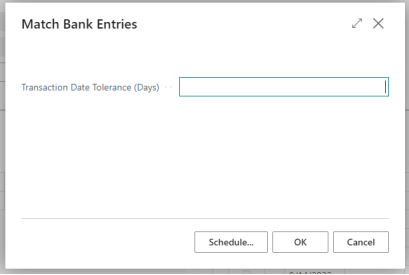
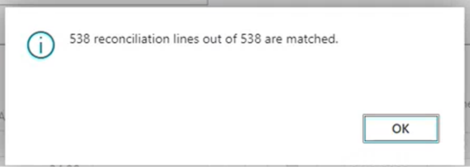
You can overwrite the suggested automatic matching or choose not to use automatic matching at all.
(You can use a mix of manual and automatic matching. If you have manually matched entries, automatic matching will not overwrite your selections.)
All bank statement lines and bank account ledger entries that can be matched change to green font.

If not all transactions were matched, use the manual matching steps shown in the latter portion of this guide.
We also recommend double-checking matched transactions that have the same amount. Click on the Applied Amount in the Bank Statement Lines table for that line and ensure that the document number in the Bank Account Ledger Entries matches the description in the Bank Statement Lines.

Remove a Match
If a transaction is incorrectly matched, the match can be removed manually.
- Select the Bank Statement Line to be unmatched
- From the Matching menu, choose Remove Match
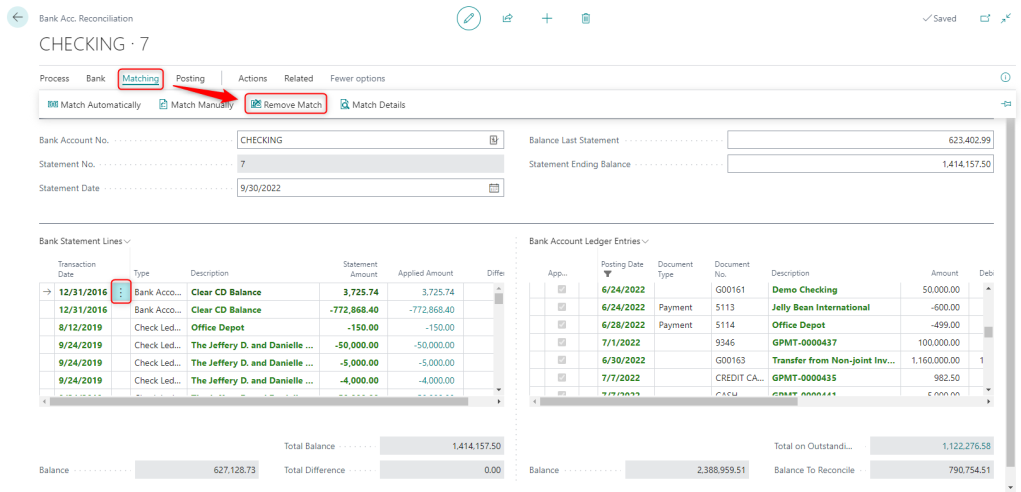
If you have matched multiple bank statement lines to a ledger entry, and need to remove one or more of the matched lines, all manual matches are removed for the ledger entry when you choose “Remove Match.”
Match Transactions Manually
When matching lines and entries manually, the “Show All,” “Show Reversed Entries,” “Hide Reversed Entries,” and “Show Nonmatched” actions can make it easier to get an overview. By default, the bank account ledger entries don't include unmatched reversed entries. To include these entries in the list and match them manually, choose the “Show Reversed Entries” action. If you choose to hide reversed entries after you've made one or more matches, the matched entries are still shown.
Manually Match Bank Ledger Entries
- Select a non-applied line in the Bank Statement Lines pane.
- In the Bank Account Ledger Entries pane, select one or more ledger entries that can be matched with the selected bank statement line.
To choose multiple lines, press and hold the CTRL key and then choose the lines.
You can also manually match multiple bank statement lines with one bank account ledger entry. For example, this might be useful if your bank deposit contained several payment methods, such as credit cards from different issuers, and your bank lists those as separate lines.
- Choose the Match Manually action.

The selected bank statement line and the selected bank account ledger entries change to green font, and the Applied check box in the right pane is selected.
- Repeat steps 1 through 3 for all Bank Statement Lines of Type “Bank Account Ledger Entry” that aren't matched.
Manually Match Check Ledger Entries
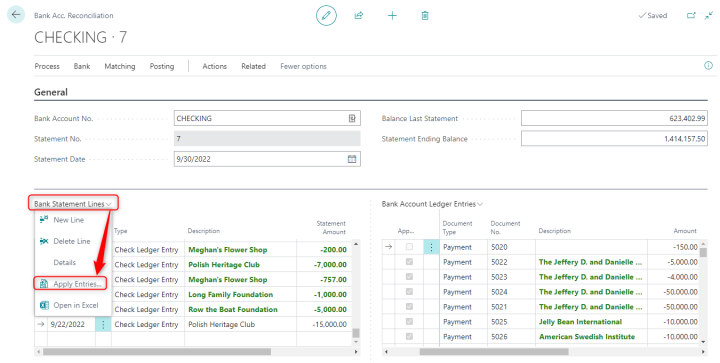
- Select a non-applied line in the Bank Statement Lines pane, of Type Check Ledger Entry.
- From the Bank Statement Lines menu, select Apply Entries…
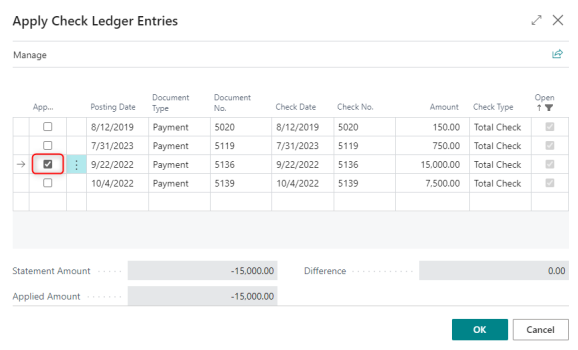
- Select the Applied check box for the corresponding Check Ledger Entries, then select OK.
ADJUSTMENTS
If entries need to be added to the Bank Account Ledger Entries (such as interest or bank service charges, transfers, etc.), these transactions should be entered through the General Journals. After they have been posted, they will automatically be added to the reconciliation.
REMOVE LINES
Depending on the selected method to populate the Bank Statement Lines, transactions that do not appear on the bank statement may need to be removed. These may include checks or deposits that have been posted in Business Central but have not yet cleared the bank.
To remove a single line, select the three vertical dots for that transaction and choose Delete Line.

To remove multiple lines at once, choose Select More, select the rows to be deleted, then from the Bank Statement Lines menu choose Delete Line.

ADD ATTACHMENTS
Attachments are linked to a Bank Account Reconciliation within the FactBox pane. If the FactBox pane is collapsed, click on the “i” icon to expand it.
Select the number (the pictured example shows “0”) to view existing documents or upload new documents.
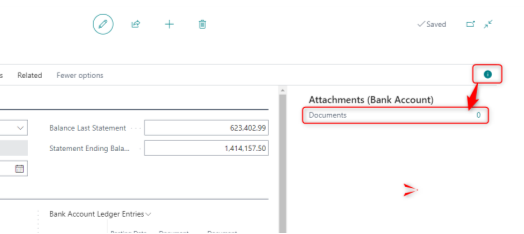
Click on + New to upload a document from your local files. Clicking on an attachment will automatically download it.

Attachments will follow a bank reconciliation once it is posted.
POST THE RECONCILIATION
To Post a Bank Acc. Reconciliation, the value in the “Total Difference” field must be zero.
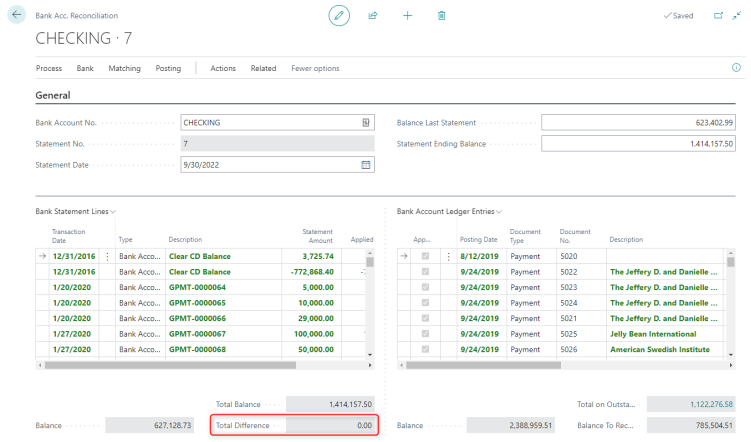
To complete the reconciliation, select Posting, then choose Post or Post and Print.

TROUBLESHOOTING
If, after comparing the Bank Statement Lines with the Bank Account Ledger Entries you still have a difference, verify the following things:
- The Balance Last Statement shows the ending balance from the previous bank statement.
- All uncleared items have been added to the reconciliation; Re-run the” Suggest Lines” process (make sure “replace lines” is off!) in case additional entries have been made since the reconciliation was started
- No entries were made directly to the g/l account for this bank account (either as journal entries or via a document such as a purchase invoice)
- Run the Process “Recalc. G/L Balance” to ensure the ending balance is up to date
VIEW A POSTED BANK RECONCILIATION
To view a posted reconciliation:
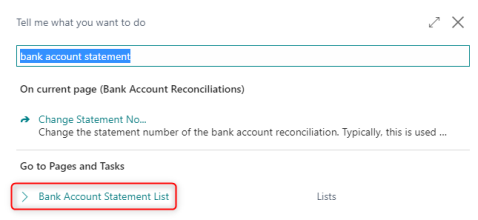
- Search for Bank Account Statement List

UNDO A BANK ACCOUNT RECONCILIATION
If you discover a mistake in a posted bank account reconciliation, you can use the Undo action on the Bank Acc. Statement page to correct the mistake.
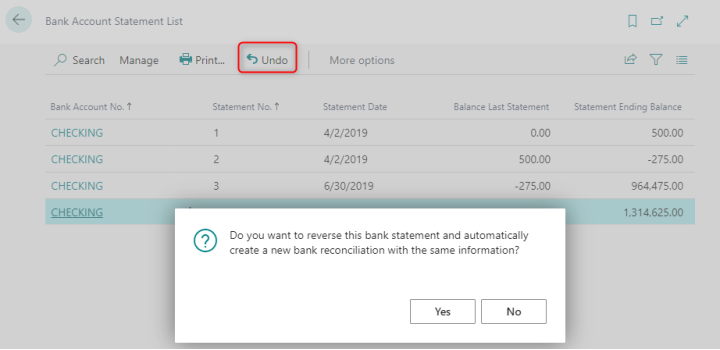
When you undo a posted bank reconciliation, the entries will be moved to the Bank Acc. Reconciliation page. You can then correct the bank reconciliation and post it again.
The bank statement number and the balance last statement for the new bank reconciliation come from the bank account card. This means that the new bank reconciliation has another number than the one you canceled. If you want to use the same number as the canceled bank reconciliation, you can use the Change Statement No. action on the Bank Acct. Reconciliation page. To do this:
- Select Actions and then Change Statement No…
- In the New Statement No. field, enter the number you want to use, and then select OK.

