

Revised 11/18/2025
enabling Outlook integration
For a user to have full functionality between work done in the akoyaGO CRM and their Outlook account, the user’s email mailbox needs to be tested and enabled from within the akoyaGO application.
ASSIGN OUTLOOK ROLE TO USER
Before a User’s Mailbox can be enabled, they must have the “Dynamics 365 App for Outlook User” Role turned on in their Security User Roles.
(For more detailed instructions about fully onboarding a User, see our guide “Onboarding and Offboarding Users.”)
ENABLING A USER'S MAILBOX
Navigate to Power Platform Environment Settings from your akoyaGO CRM:
- Click the Approve Email button
- Click Test & Enable Mailboxes button
- Click Refresh button
- Note when Success is listed in Incoming Email Status and Outgoing Email Status
Note: The Test & Enable Mailboxes process can take several minutes, and a page refresh (Ctrl+F5) may be needed to check if the run was successful.
FINAL CONNECTION TO OUTLOOK
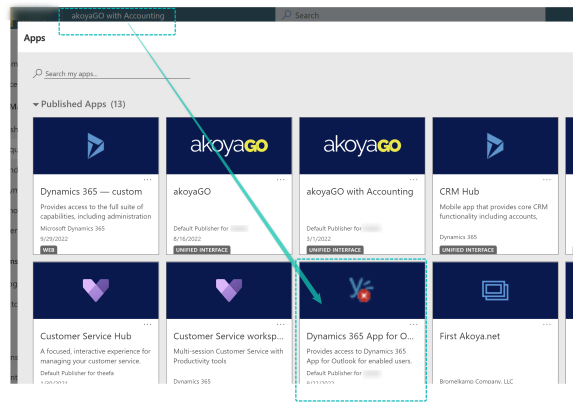
After the mailbox has been successfully enabled in the akoyaGO settings, you’ll need to finish adding the Dynamics Outlook App to the user. Click on the environment link in the top left corner (akoyaGO or akoyaGO with Accounting), then select the Dynamics 365 App for Outlook tile.
or
In Power Platform, Select "Dynamics 365 App for Outlook"
Once the following screen pops up:
- Search for the user and check the box next to their name
- Click the Add App to Outlook button
- Wait until the Status shows “Added to Outlook” (You may need to back out of this window, then back in if the status hasn’t changed in a couple of minutes)
- Click the Save button
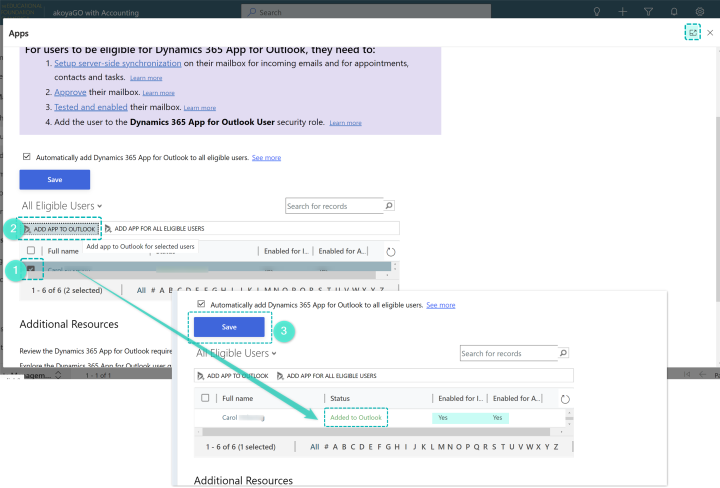
Tip: It can be helpful to click the expand window button in the top right corner in order to get a better view of the list of users.